

Your Mahindra Roxor is a beast. It's built for the mud. It's built for the grit. But right now, it looks like every other stock rig on the trail. A custom kit is more than just a decal. It's visual armor for your machine. We know the hesitation. You don't want to blow cash on a high-performance kit only to ruin it with air bubbles or peeling edges. Roxor graphics installation feels like a high-stakes gamble when you're staring down a dry application without a tactical plan. Stop overthinking it. We're going to turn that fear into a factory-quality reality.
This guide delivers the expert approach you need for a professional, bubble-free finish that dominates the trail. We'll break down the mechanical precision required for perfect surface prep. We'll settle the wet versus dry debate once and for all. You'll master the techniques that ensure your graphics survive the harshest off-road elements. It's time to take pride in a DIY project that looks like it rolled out of a pro custom shop. Your rig deserves a look that matches its power. Let's get to work.
Key Takeaways
- Gear up for success. Use high-grade isopropyl alcohol and a felt-edge squeegee to ensure your graphics bond tight without a single scratch.
- Choose your tactic. Use the wet method for large panels to allow for repositioning, or stick to the dry method for fast, small-scale accents.
- Lock in the alignment. Vertical hinges and painters tape take the stress out of Roxor graphics installation, giving you a factory-straight finish every time.
- Dominate the details. Use controlled heat to wrap vinyl around military-style curves and use the "poke and heat" technique to crush bubbles over rivets.
- Build the complete identity. Pair your custom look with performance tuning and rugged accessories for a machine that's as mean as it looks.
The Arsenal: Essential Tools for a Professional Roxor Finish
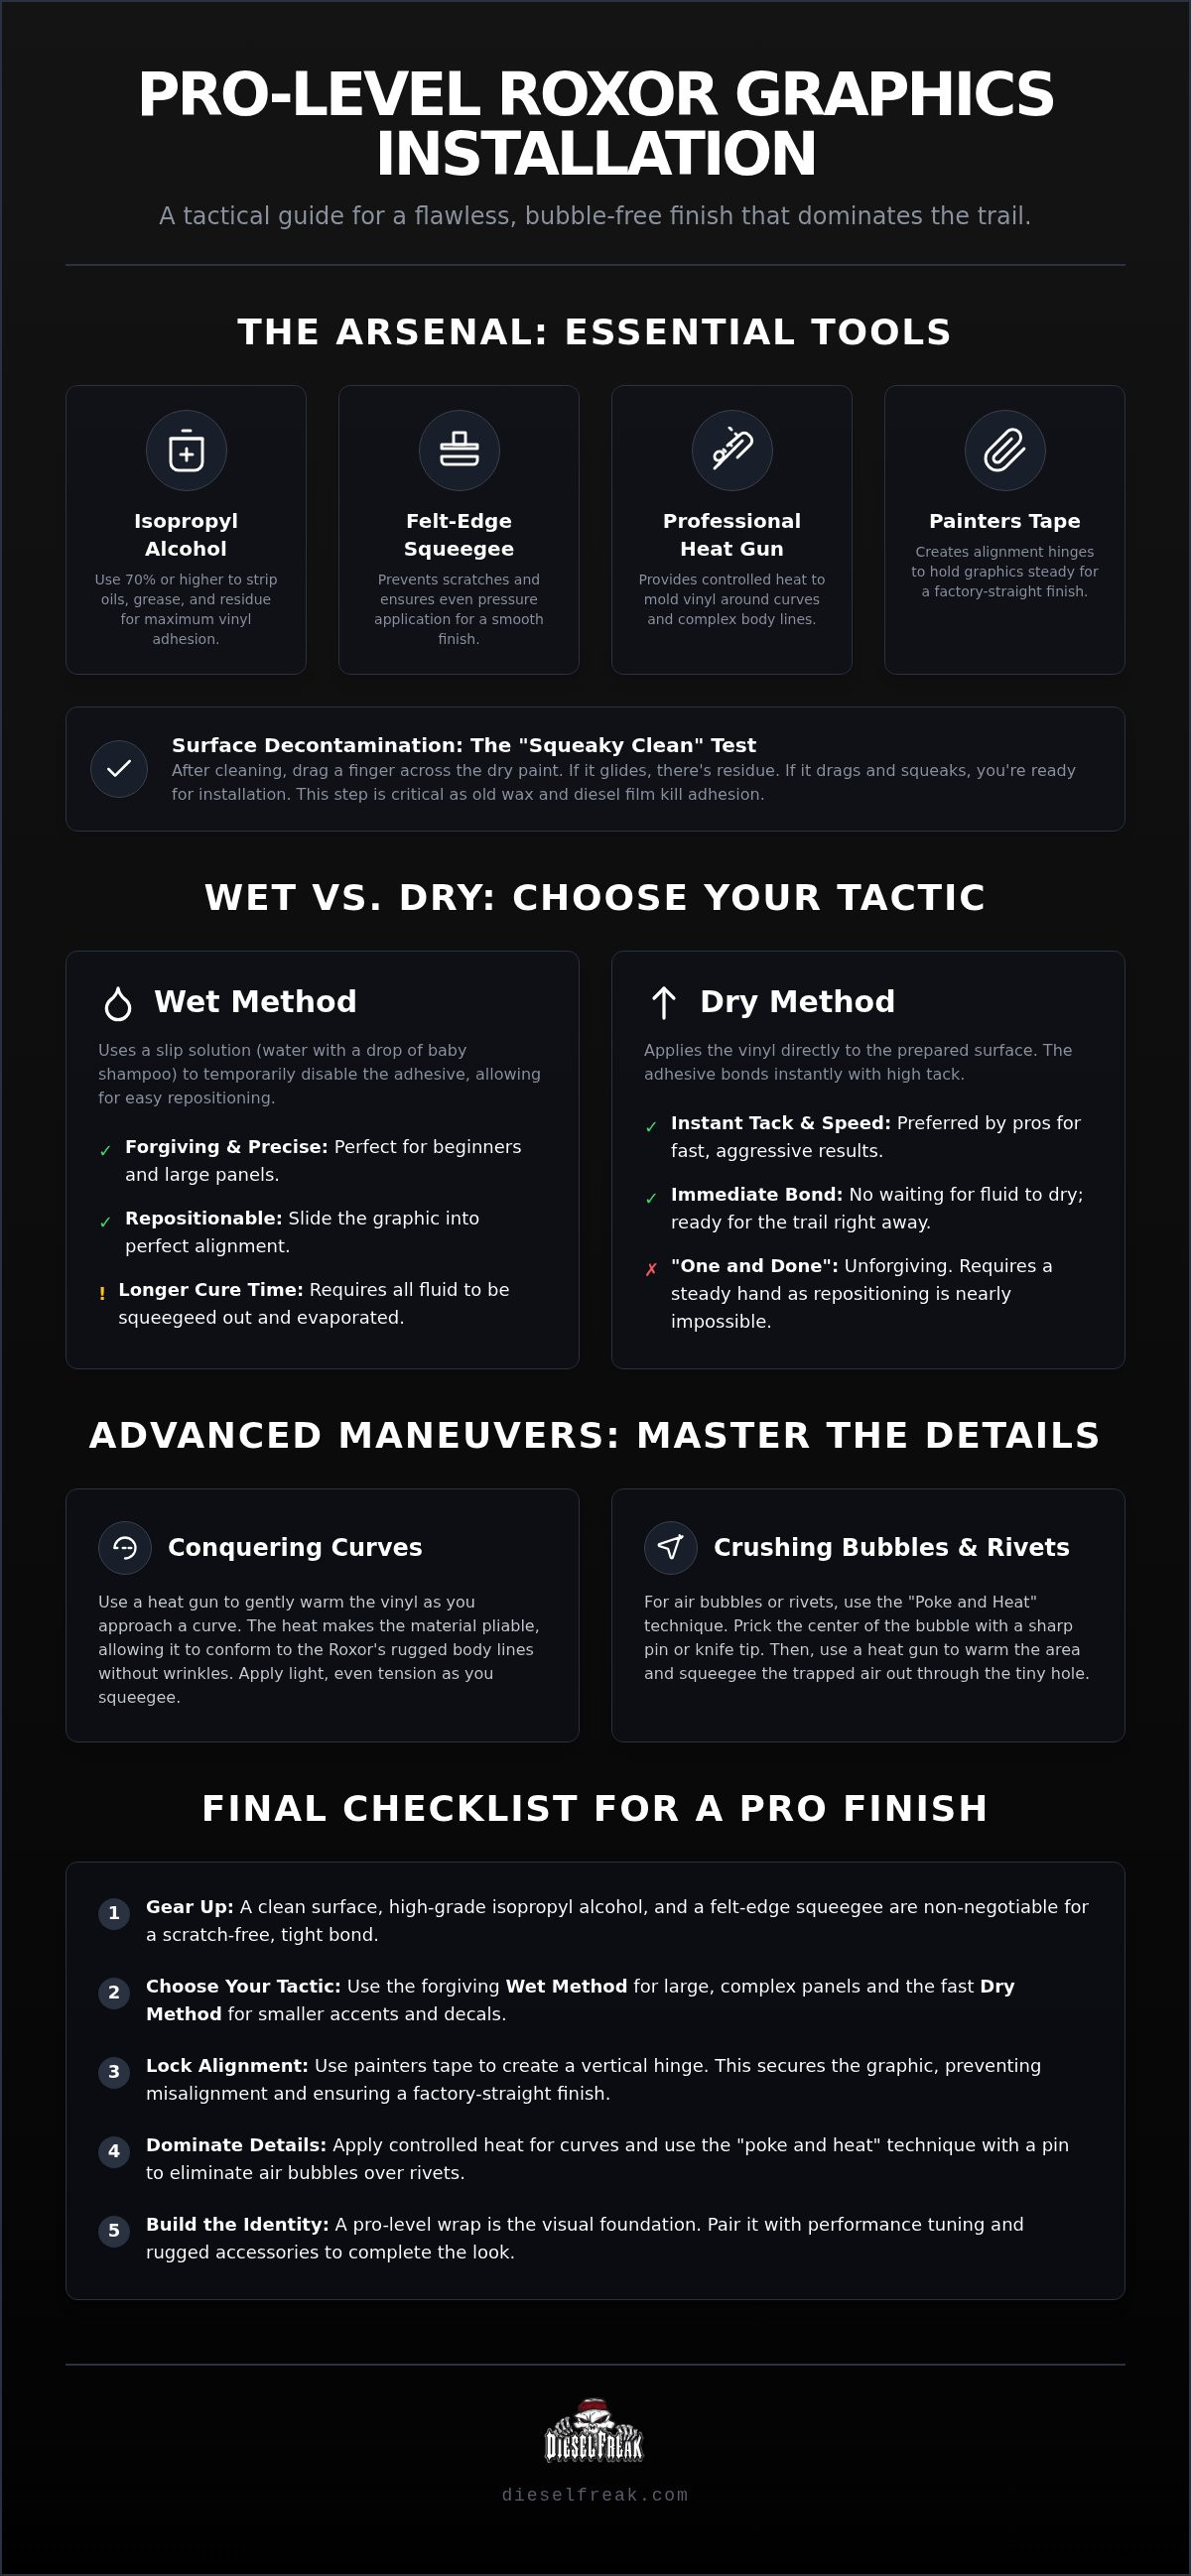
You wouldn't rebuild a turbo with a butter knife. Precision requires the right gear. A high-performance machine deserves a high-performance finish. Before you peel the backing off your new kit, you need to prep your workspace. A successful Roxor graphics installation depends entirely on your arsenal. If your tools are weak, your results will be too. Gather these essentials before you touch the paint.
- High-grade Isopropyl Alcohol (70% or higher): This is your primary decontamination agent. It strips oils and residues that standard soap leaves behind.
- Felt-Edge Squeegee: This is your main applicator. The felt buffer prevents marring and ensures even pressure across the vinyl surface.
- Professional Heat Gun: You need controlled heat to mold vinyl around the Roxor’s rugged body lines. A high-output hair dryer works, but a heat gun offers tactical precision.
- Painters Tape: Essential for creating alignment hinges. It holds the graphic in place without leaving a sticky residue on your panels.
Surface Decontamination Strategy
Mud is easy to see. It's the invisible enemies that ruin a wrap. Off-road rigs are magnets for diesel film, grease, and trail dust. Soap and water alone won't cut it. You need to strip the surface down to the bare paint. Old waxes and ceramic coatings are adhesion killers. They create a slick barrier that prevents the vinyl from reaching its full tack. Use the "Squeaky Clean" test. Drag a clean finger across the dry paint. If it glides, there's still residue. If it drags and squeaks, you're ready for the kit.
The Felt-Edge Squeegee Advantage
When performing a Roxor graphics installation, the squeegee is your most used tool. A hard plastic squeegee is a liability. One wrong move and you've gouged a permanent scratch into your visual armor. Felt-protected edges are non-negotiable for both gloss and matte finishes. They glide over the vinyl, distributing pressure without creating friction heat. If you're in a total pinch, wrap a clean microfiber cloth tightly around a standard plastic credit card. It's a desperate move, but it's better than ruining a premium graphics kit with raw plastic. Professional tools deliver professional results. Don't cut corners on the finish line.
Wet vs. Dry Application: Choosing Your Tactical Approach
Every professional installer has a preference. For your rig, the choice is a tactical decision. It’s the difference between a clean, aggressive finish and a wasted graphics kit. You need to assess the terrain before you peel the backing. Large panels require a different strategy than small accents. A successful Roxor graphics installation depends on matching your method to the size of the vinyl and your own steady hand. Don't rush the choice. Evaluate the kit complexity and your environment first.
Temperature and wind are your biggest enemies. Heat makes vinyl gummy and over-stretches the material. Wind carries trail dust that creates permanent bumps under your visual armor. Work in a shaded, dead-calm area. If you're tackling massive side-panel wraps, the wet method is your safety net. If you're hitting small fender logos or hood accents, the dry method offers the speed you need to get back on the trail.
The Wet Method: Forgiving and Precise
The wet method relies on a slip solution. Mix clean water with a single drop of baby shampoo in a spray bottle. This solution breaks the initial tack of the adhesive. It allows you to slide the graphic across the body panel until the alignment is dead-on. It’s the ultimate insurance policy for beginners. You get infinite repositioning power. The trade-off is the clock. You must squeegee every drop of fluid out from under the vinyl. The bond isn't permanent until the moisture evaporates. Expect longer drying times before you can safely hit the mud. If you want to see the variety of kits available for this method, check out the ROXOR GRAPHICS designed for high-performance builds.
The Dry Method: Instant Tack and Speed
Pros prefer the dry approach for a reason. It's fast. It's aggressive. It's clean. There is no slip solution and no waiting for fluid to dry. However, it requires a "one and done" mindset. Once the high-tack vinyl touches the surface, it wants to stay there. This is the "point of no return." Use the dry method for smaller Roxor hood decals or fender accents where alignment is easy to manage. It provides an immediate, permanent bond that stands up to off-road abuse the moment you finish the install. Master the dry method on small pieces before you attempt a full-body wrap. Precision is mandatory here. There are no second chances once the adhesive bites the paint.
Executing the Install: A Step-by-Step Tactical Guide
Preparation is over. Now comes the execution. A Roxor graphics installation isn't about luck. It’s about control. You’ve prepped the surface with mechanical precision. You’ve chosen your tactical method. Now you need to anchor the vinyl before the adhesive ever touches the paint. Start by dry-fitting the kit. Position the graphic exactly where you want it. Use painters tape to secure the top corners. Step back. Check the alignment against the body lines. Your Roxor has a military-inspired silhouette. Respect those lines. If the alignment is off by even a fraction, the whole rig looks sloppy. Fix it now while the backing is still on.
The Hinge Method Mastery
Large body panels are intimidating. Don't fight the whole sheet at once. Create a vertical center hinge by running a strip of painters tape down the middle of the graphic. This divides the job into two manageable sectors. This vertical anchor is your pivot point. Secure the graphic without removing the backing paper yet. Peel one half of the kit away from the backing and cut the paper off. Now you have maximum control over a smaller section. This prevents the graphic from shifting during the "big peel." It’s a tactical maneuver that ensures your alignment stays locked while you work. By peeling only half at a time, you eliminate the risk of the vinyl folding onto itself. It’s about managing the "point of no return." Keep the tension even. Don't let the vinyl sag. A steady hand here prevents the frustration of a ruined kit. This is how pros handle full-body wraps without a dedicated shop team.
Squeegee Technique: Overlap for Success
Your squeegee is your primary weapon against air pockets. Hold it at a 45-degree angle. This angle directs the air and fluid outward instead of trapping it under the vinyl. Think of it like a snowplow. You want to push everything to the side. Use the 50% overlap rule. Every stroke should cover half of the previous one. This creates a continuous wave that pushes air to the edges. Work from the center hinge outward. Apply consistent, heavy pressure to activate the adhesive bond. If you see a bubble, stop. Lift the vinyl slightly if you're using the wet method, or use heat to relax it. Never skip the overlap. It’s the only way to guarantee a professional finish that won't peel when you're deep in the brush. If you're working on a performance-tuned rig, you know that details matter. The same applies here. Overlapping ensures no inch of adhesive is left unpressed. This is the secret to a bond that survives high-pressure washes and thick mud. You're building visual armor that dominates the trail. Master the technique. Own the result.
Advanced Maneuvers: Conquering Curves, Rivets, and Edges
The flat panels are done. Now the real work begins. Your Roxor isn't a billboard. It's a mechanical beast with military-style curves and exposed rivets. These features define the rig. They also make Roxor graphics installation a challenge for the unprepared. You need to mold the vinyl to the machine. Heat is your ally here. It relaxes the material. It makes the vinyl pliable enough to follow every contour without tension. Avoid overstretching. If you pull too hard, the color fades and the adhesive fails. Use just enough heat to let the vinyl relax into the recesses. This creates a finish that looks painted on rather than stuck on.
Trimming excess vinyl is where you earn your stripes. Cut at the door seams and hood edges for a clean finish. Use a fresh blade for every panel. A dull edge will snag and ruin your visual armor. Leave a tiny margin to tuck around the edges. This prevents the wind from catching a corner on the highway. This level of detail turns a DIY project into a professional masterpiece. It’s about more than just looks. It’s about building a finish that survives the grit of the trail.
Dominating the Roxor Rivets
Rivets are the enemy of a smooth finish. Vinyl likes to "tent" over these bumps. This creates air pockets that lead to peeling. Don't ignore them. Use localized heat to soften the vinyl directly over the rivet. Once it's warm, use a rivet brush or firm thumb pressure to seat the material. If a bubble remains, use the "Poke and Heat" technique. Take a fine needle. Prick the edge of the bubble. Apply heat and press the air out. This ensures the graphic conforms to the hardware. It prevents "fingering" or lifting at high-stress points. This is how you achieve a shop-quality look on a rugged machine.
Post-Heating for Permanent Bond
The job isn't finished when the last piece is down. You must post-heat every inch of the kit. This is the science of "wet-out." Heat activates the adhesive on a molecular level. It forces the bond to become permanent. Use your heat gun to bring the surface temperature to approximately 180 to 200 degrees Fahrenheit. Focus on the edges and corners. These are the primary lift points. If the vinyl stays down at these temperatures, it's locked. It won't fail when the sun hits it or the mud gets thick. Ready to give your machine the visual armor it deserves? Grab your ROXOR GRAPHICS and start the transformation today.
Beyond the Wrap: Completing the Diesel Freak Identity
The hard work is done. Your Roxor graphics installation is complete. You’ve mastered the squeegee, conquered the rivets, and post-heated the edges for a permanent bond. Now your rig looks like a pro-built machine. But visual armor is only half the battle. A rig that looks this aggressive needs the mechanical grit to back it up. You don't want a machine that’s all show and no go. It’s time to align your visual identity with raw, trail-dominating performance. Don't settle for a stock engine under a custom wrap.
Complete the transformation by looking at the glass and the gear. Upgrading your off-road visibility with Roxor Wipers & Windshields is a tactical necessity for the mud. You can’t dominate the trail if you can’t see it. While you’re at it, represent the brand that fuels your passion. Throwing on some rugged Diesel Freak Apparel ensures you look as sharp as your rig when you step out of the driver's seat. For those looking to create their own unique team gear, RAW Merch provides high-quality custom printing to help you wear your identity with pride. It’s about more than just parts. It’s a lifestyle built on mechanical superiority and grit. You've built the machine. Now wear the badge.
To truly complete your vehicle's custom identity, consider the atmosphere inside the cabin as well; visit Flava Car Scents to find luxury fragrances that elevate your driving experience and match your rig's bold new persona.
A custom look deserves custom power. Pairing your new graphics with high-performance ROXOR TUNING is the ultimate power move. You’ve fixed the exterior. Now fix the factory limitations. Increasing your mechanical torque ensures your machine handles the biggest tires and steepest inclines without breaking a sweat. For those who demand peak dominance, a BorgWarner Turbo upgrade delivers the heavy-duty boost your diesel engine craves. Join the Diesel Freak community. We value raw power and the thrill of high-performance machinery. Make your rig the envy of every enthusiast on the trail. Performance and style must move in lockstep.
Caring for Your Custom Graphics
Don't let the trail destroy your investment. Maintenance is a mechanical skill too. Avoid high-pressure washers at close range. The force can catch an edge and lift the vinyl you worked so hard to install. Use a gentle hand and recommended cleaning agents designed for off-road mud and grime. Harsh chemicals can dull the finish and kill the adhesive. UV protection is your final defense. The sun is a slow killer for vinyl colors. Apply a dedicated UV protectant to keep your graphics vibrant and resilient against the elements. Hard work created this look. Smart maintenance keeps it alive. Your Roxor is a statement. Keep it loud. Keep it proud. Keep it Diesel Freak.
Dominate the Trail with Visual Armor
You have the blueprint. You've seen the arsenal. A professional Roxor graphics installation is no longer a mystery; it's a mechanical skill you now own. By mastering surface decontamination and the vertical hinge method, you've moved beyond the amateur level. You know how to handle the rivets and curves that leave others frustrated. This isn't just about a sticker. It's about building a rig that commands respect through every mud hole and rock crawl.
Diesel Freak has been a leader in diesel performance since 2009. We build gear for the toughest off-road trails because we live this lifestyle. Our high-performance components for Class 8 and Roxor rigs are tested where it matters most. Don't stop at the wrap. Pair your new look with heavy-duty tuning and apparel that turn heads and crush obstacles. It's time to stop blending in and start leading the pack with a machine that's as tough as you are.
Upgrade Your Roxor with Custom Graphics and Performance Gear
Get out there and show the trail what a real machine looks like. Build it. Wrap it. Drive it.
Frequently Asked Questions
Can I install Roxor graphics by myself or do I need a pro?
You can absolutely handle this project yourself. It requires a tactical approach and the right gear, but any enthusiast with mechanical patience can achieve a shop-quality finish. Professionals offer speed, but a DIY install gives you total control over the visual armor of your rig. Follow the steps for surface prep and alignment hinges to ensure your Mahindra Roxor looks pro-built without the shop labor costs.
What is the best temperature for applying vinyl graphics to a Roxor?
Aim for a temperature range between 60°F and 80°F. Extreme heat makes the vinyl gummy and difficult to manage, while cold temperatures prevent the adhesive from reaching its full tack. Working in a shaded, climate-controlled garage is ideal. If you're outdoors, avoid direct sunlight on the body panels. Consistent temperature ensures the material remains pliable during the Roxor graphics installation process without overstretching or failing to bond.
How do I get rid of air bubbles after the graphic is already stuck?
Use the "poke and heat" technique for stubborn air pockets. Take a fine needle and prick the edge of the bubble to create a tiny escape route for the air. Apply localized heat with your heat gun to relax the vinyl, then use your thumb or a squeegee to press the air out toward the hole. Don't try to force large bubbles down without a vent; you'll just stretch the material and create a permanent crease.
Will these graphics damage the paint on my Mahindra Roxor?
No, high-performance graphics act as visual armor for your factory paint. They provide a sacrificial layer against trail brush, debris, and UV rays. If the paint is in good condition and fully cured before installation, the vinyl will peel off cleanly when it's time for a new look. Avoid installing over fresh, uncured paint or rust, as the adhesive bond can pull loose material during removal or create uneven textures.
How long do I need to wait after installation before going off-road?
Wait at least 24 to 48 hours before hitting the trail or washing your rig. The adhesive needs time to "wet-out" and create a permanent bond with the body panels. If you used the wet method, this waiting period is non-negotiable to allow all moisture to evaporate. Speeding onto the trail too early risks edge lifting from wind or mud contamination. Patience now ensures your graphics survive the grit of the trail later.
What should I do if the graphic starts peeling at the edges?
Act fast to save the bond. Clean the area under the lifting edge with a small amount of isopropyl alcohol to remove any trail dust or grease. Apply localized heat to reactivate the adhesive and press it down firmly with a felt-edge squeegee. If the edge is contaminated or damaged beyond repair, trim the peeling section with a sharp blade to prevent the wind from catching the rest of the graphic during high-speed runs.
Can I use a hair dryer instead of a heat gun for Roxor graphics?
A high-output hair dryer works in a pinch, but a professional heat gun is the superior tool. Hair dryers often lack the concentrated heat needed to properly "relax" vinyl around military-style curves or reach post-heating temperatures of 180 degrees. If you use a dryer, keep it on the highest setting and work closer to the material. For a truly professional Roxor graphics installation, the tactical precision of a heat gun is worth the investment.
Is the wet method better than the dry method for beginners?
The wet method is the ultimate safety net for beginners tackling large side panels. It uses a slip solution to break the initial tack, allowing you to slide the graphic into the perfect position. This eliminates the "point of no return" anxiety of dry application. While it requires longer drying times and more squeegee work, the precision it offers for massive graphics makes it the smarter tactical choice for your first install.
Disclaimer
Diesel Freak LLC is in no way associated, sponsored, or affiliated with Any OEM manufacturer. Products from Diesel Freak LLC presented in this listing are not to be confused with any of the products or trademarks of any OEM company. All parts listed to fit these manufacturers are replacement aftermarket parts.